CrewAI Tutorial By Example: Automate YouTube Channel With AI Agents (Part 1/4)
By Kronecker AI Research ·
In this tutorial series, I’ll guide you through a CrewAI full tutorial by example use case to automate a YouTube channel.
Our tutorial starts with a quick overview of the AI agent we’ll be working on, followed by a step-by-step tutorial to build an AI agent that can automate YouTube video production using CrewAI. Don’t worry; you won’t need any prerequisites with CrewAI to follow along. I’ll be explaining every piece of the code thoroughly, and we’ll analyze the system built with CrewAI, discussing how it operates and what makes it work. I’ll share my honest opinions on the pros and cons of using CrewAI for your automation needs.
Without further ado, let’s get started!
This article explains on AI agents, CrewAI, the project structure and setup, before diving into the code in the next article. If you’d prefer to start coding right away, please proceed to the Part 2 article.
Article Outline
- AI Agent Structure
- CrewAI Overview
- Project Structure
- Project Setup
AI Agent Structure
Let’s get into the structure of the AI agent that we are building. When we talk about an AI agent, we are referring to a system with some level of autonomy that can accomplish clearly defined goals on behalf of the users. AI agents these days often involve several large language models (LLMs), like ChatGPT or Claude, collaborating with each other to attain the pre-defined goals.
Our goal today is clear: we want to automate the video production process to make our life a lot easier.
So what would the AI agent for this job look like?
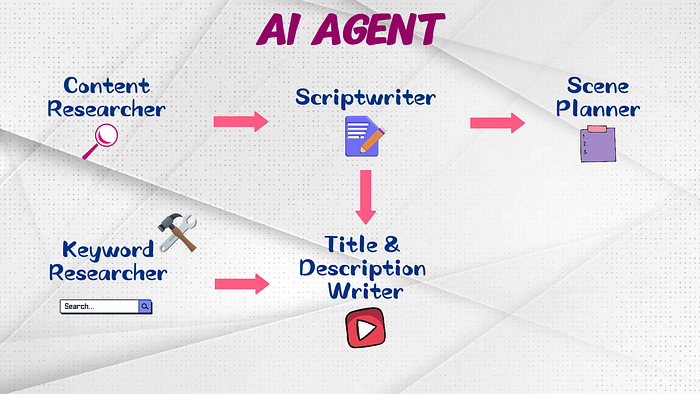
Our AI agent comprises the following elements:
- Content Researcher
Collects the information needed for our video content and uses the data to craft a content outline with sections and key points for the video - Scriptwriter
Creates a script for the video based on the content outline - Scene Planner
Plans the scenes of our video - Keyword Researcher
Perform keyword research using some tools to look for well-performing YouTube videos on the desired keyword - Title & Description Writer
Generates a suitable title and description for our new YouTube video based on the script and the keyword search results
If you’d like to explore different AI agent structures from CrewAI, I recommend checking out the examples they offer in their GitHub repo.
CrewAI Overview
Let look at some basics of CrewAI and how it will help us create the desired AI agent. As the name suggests, the idea behind CrewAI is to build a crew that collaborates to achieve pre-defined goals. Think of it like assembling a team — where each member has a specific role and purpose.
Within a crew, we have specialized agents. Each agent is tailored for different tasks, working together to achieve our project goals. They can function in a sequential process, meaning the next agent relies on the output of the previous one. Alternatively, these agents can operate in a hierarchical setup, where a manager agent delegates tasks to other agents within a lower hierarchy. Once we set up the structure, the agents execute tasks accordingly, using the tools we provide if necessary.
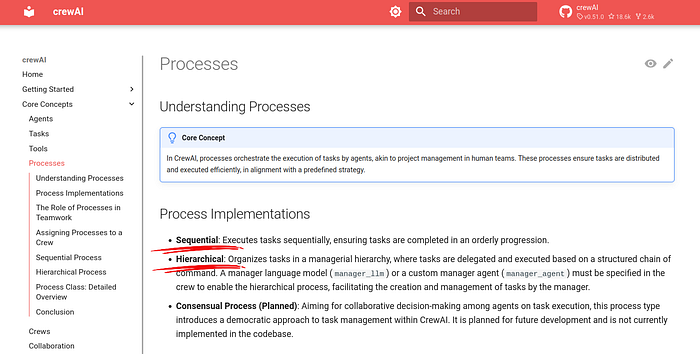
Now, one thing to note is that when I mention agents here, I’m referring to the Agent() function from CrewAI. This is different from the AI agents that we talked about earlier. AI agents generally refer to the entire AI system that collaborates as a whole to meet the objectives defined by the users.
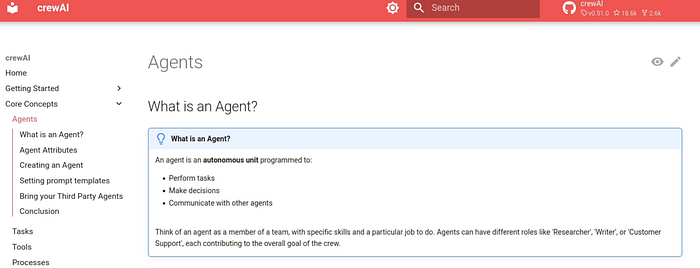
When we get into CrewAI later, I will mention AI systems instead of AI agents, to avoid confusion with the CrewAI Agent() function.
If you’d like to learn more about CrewAI, I recommend their short course on DeepLearning AI.
Project Structure
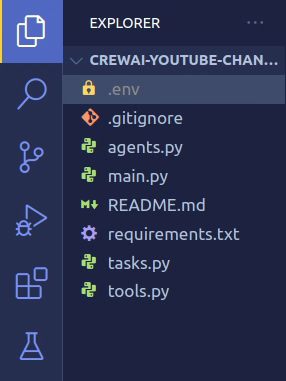
Let’s look at the project structure, which is pretty simple and intuitive. Within the project folder, we have:
main.py: The file that runs our main CrewAI setupagents.py: Defines all the agents at work within our AI systemtasks.py: Specifies the tasks that our agents will executetools.py: Contains all custom tools we define for the agents to use
Don’t worry if all this doesn’t make sense to you right now. I completely understand that it might be overwhelming, especially if you’re new to this. In the Part 2 article, we will go through every piece of the code, step-by-step, breaking it down into portions that are easy for you to understand.
Check out the GitHub repo for the code of this tutorial series.
Project Setup
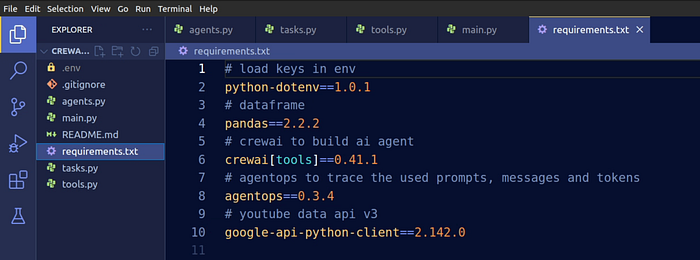
Let’s look into the setup and the packages you need for this project. Here are the packages we need in the requirements file to get started:
python-dotenvpackage to load API keys and credentials into the environmentpandasto work with dataframescrewaiwith toolsagentopsto monitor the performance of our AI systemgoogle-api-python-clientfor YouTube data extraction
Install all the packages under your virtual environment.
API keys
Let’s move on to obtaining the required API keys. For the LLM in this tutorial, we need an OpenAI API key. First, create an OpenAI account at platform.openai.com, and login. New users get a $5 free credit, which expires in about three months.
Navigate to Dashboard >> API keys >> create a new secret key, and copy it into the .env file you created: OPENAI_API_KEY="sk..."
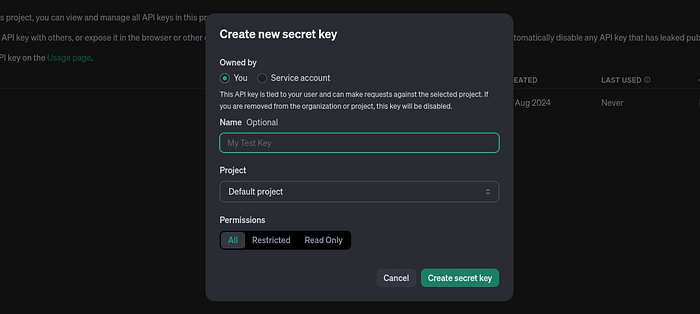
If you’re using GitHub, NEVER push your .env file credentials into the repository. You’ll have to put .env in your .gitignore file.
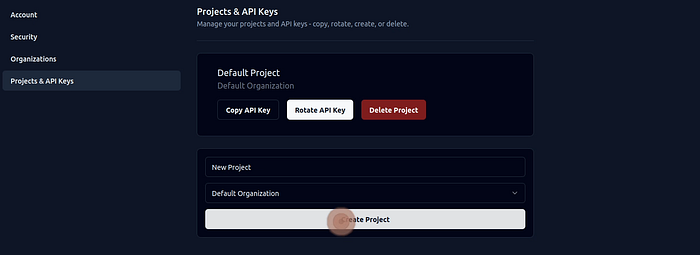
Next, we get the AgentOps API key. Head over to agentops.ai and create your account. Then sign in at app.agentops.ai, go to API keys >> create a new project, and copy the API key into your .env file: AGENTOPS_API_KEY="xxx..."
And now, for the YouTube Data API key. If you don’t already have a Google Cloud Platform account, you’ll need to create one at cloud.google.com. Upon signup, you’ll receive a $300 free credit. Create a new project, ensure that your console is set to this new project. And make sure to activate your free trial to a full account. There is a banner at the top of your page for that.
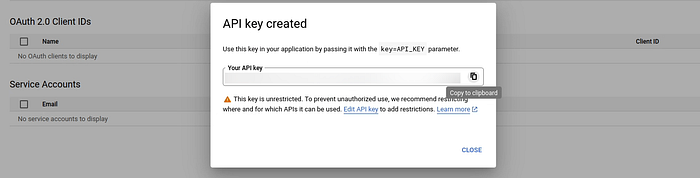
Go to API & Services, enable the YouTube Data API. After that, navigate to Credentials >> Create credentials >> API key. Finally, copy the key into your .env file and name it accordingly: YOUTUBE_API_KEY="yyy..."
Now that we have set up our project, we’re ready to move on! Next up in the Part 2 article, we will proceed to the CrewAI code for our AI system.
Frequently asked questions
What should I decide before adapting this example to another workflow?
Write down the final deliverable and the intermediate outputs someone would need to produce it manually. Choose a workflow where you can inspect those outputs. That gives you a practical starting point for deciding which responsibilities belong together and where a separate agent might help.
Does every step in the workflow need its own agent?
No. Treat each agent boundary as a design choice you can justify. A separate role is useful when it needs different instructions, tools or a clearly defined handoff. If two steps always use the same information and are judged together, start by considering whether they can remain one task.
What should I do if my installed packages behave differently from the screenshots?
Use the tutorial date as context and record the package versions you are running. Reproduce the smallest failing step before changing the whole project. Keep any compatibility changes separate from your workflow changes, so you can tell whether a different result came from the environment or the design.
How can I keep the first experiment small enough to inspect?
Choose one familiar topic and review the research outline before adding the rest of the workflow. Keep its inputs and output together. A small experiment is useful when you can explain what went wrong, rather than merely observe that the final result is disappointing.